How do I install and set up an eSIM on my Android phone?
Activating your eSIM after purchase is easy. Simply follow the steps to activate your eSIM and enable data roaming when you arrive at your destination. You can set up your eSIM using two methods: Quick Installation and Manual Setup. This article provides step-by-step instructions for installation and configuration of eSIM. Just follow the guide below to get started.
Installation and Configuration of eSIM on an Android device:
Before starting to install, make sure you have good internet connection, an eSIM compatible device and a device that is network unlocked.
Go to Settings, then Connections, then open SIM manager.
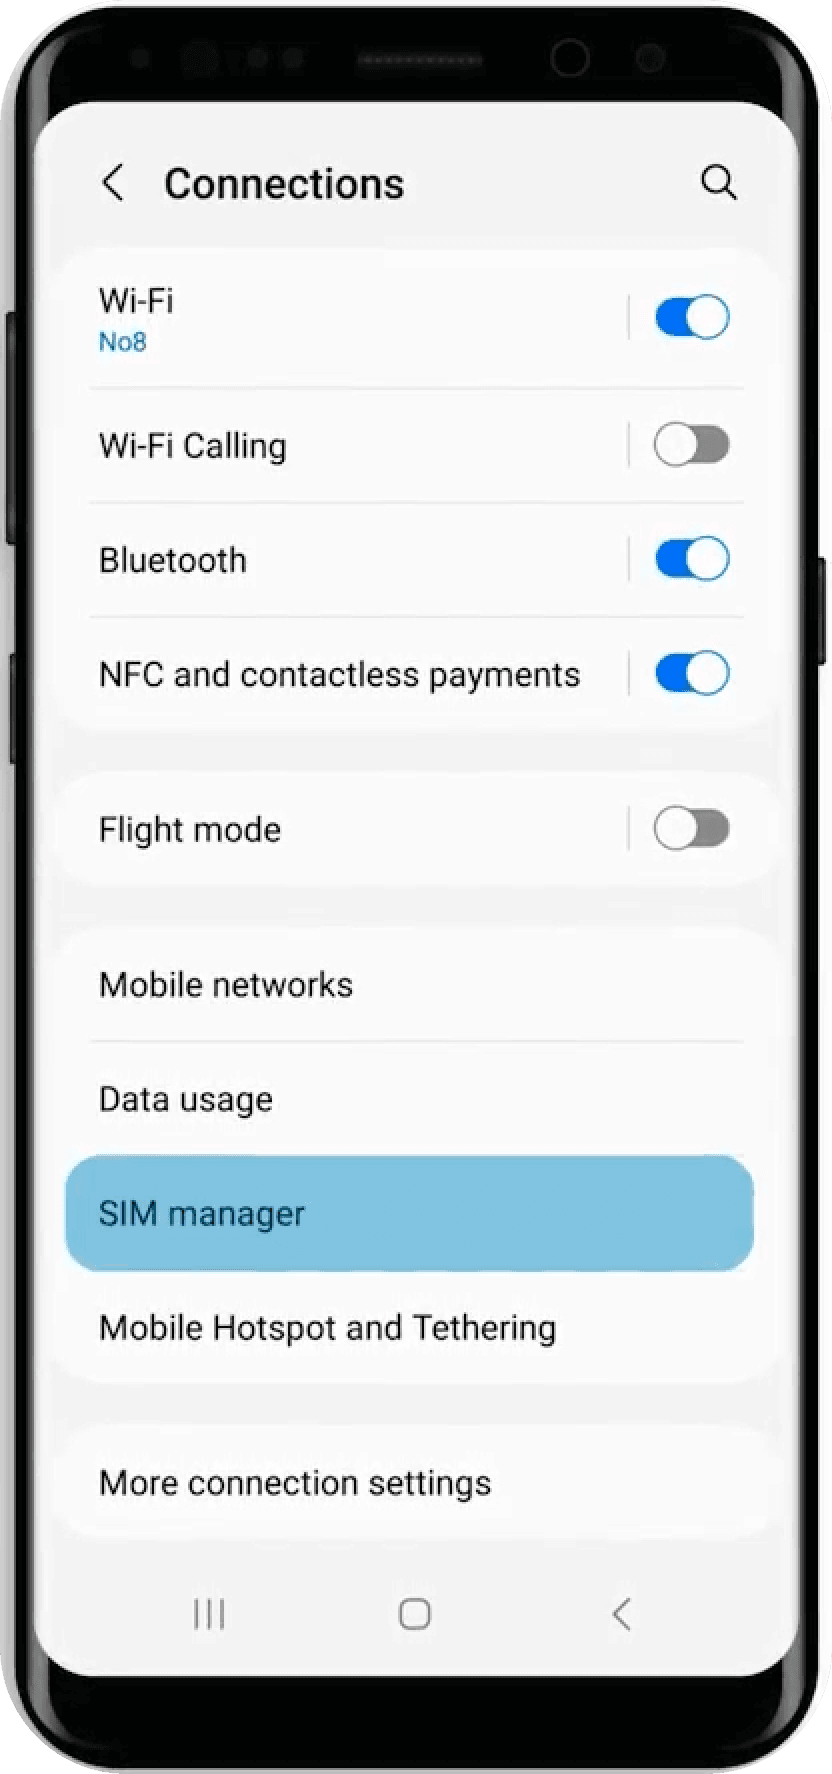
- Tap Add eSIM.
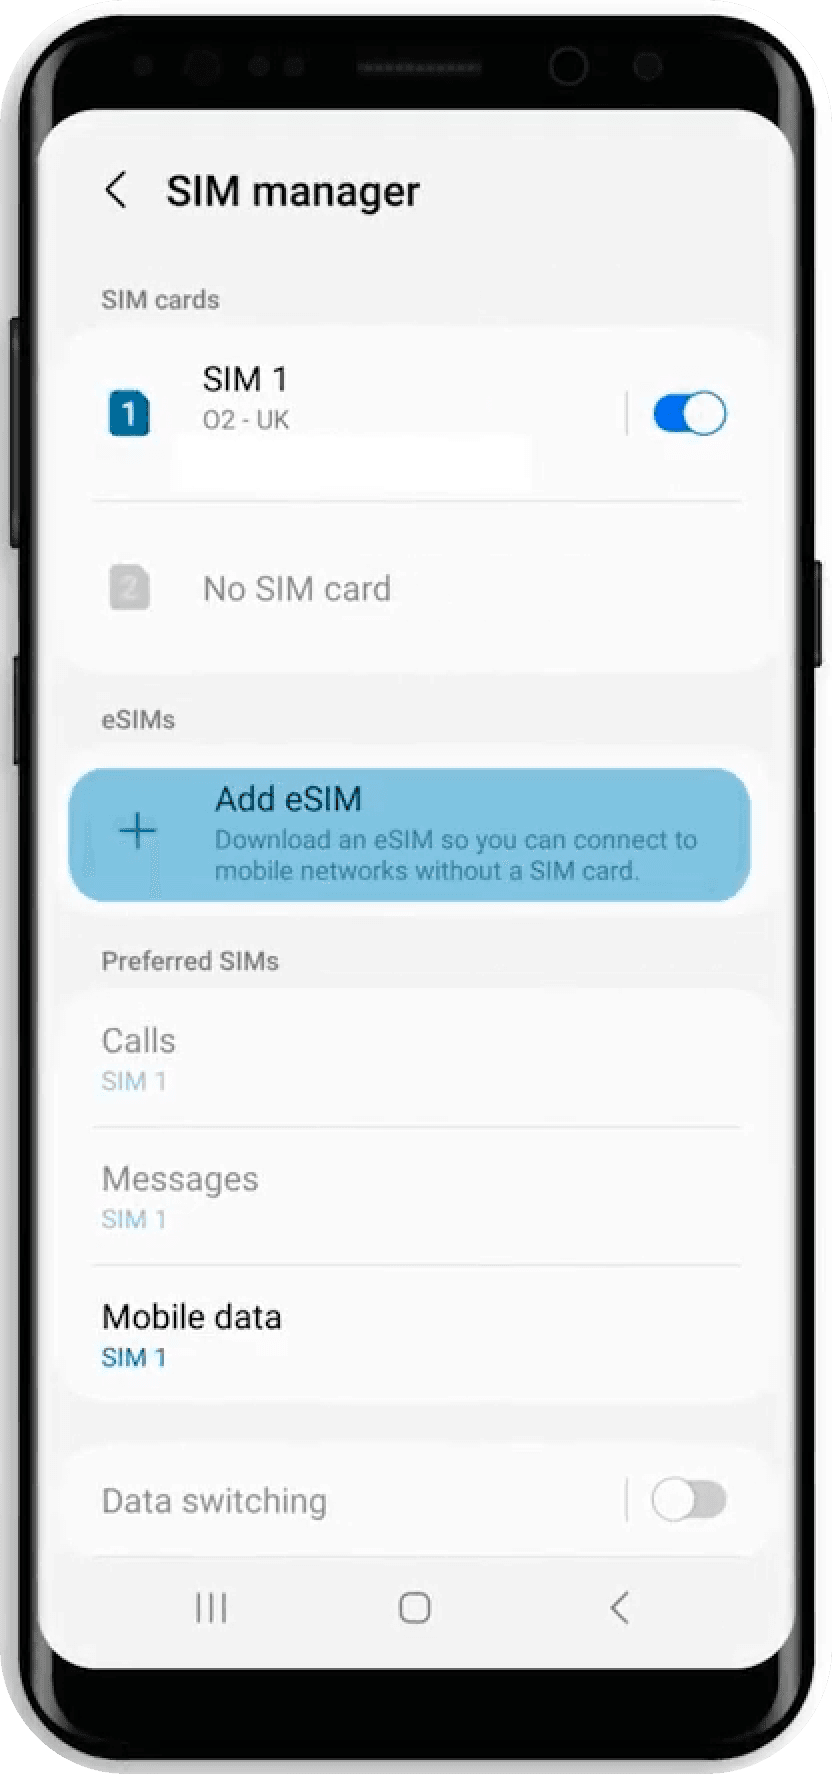
- When prompted, tap Scan QR code from service provider.
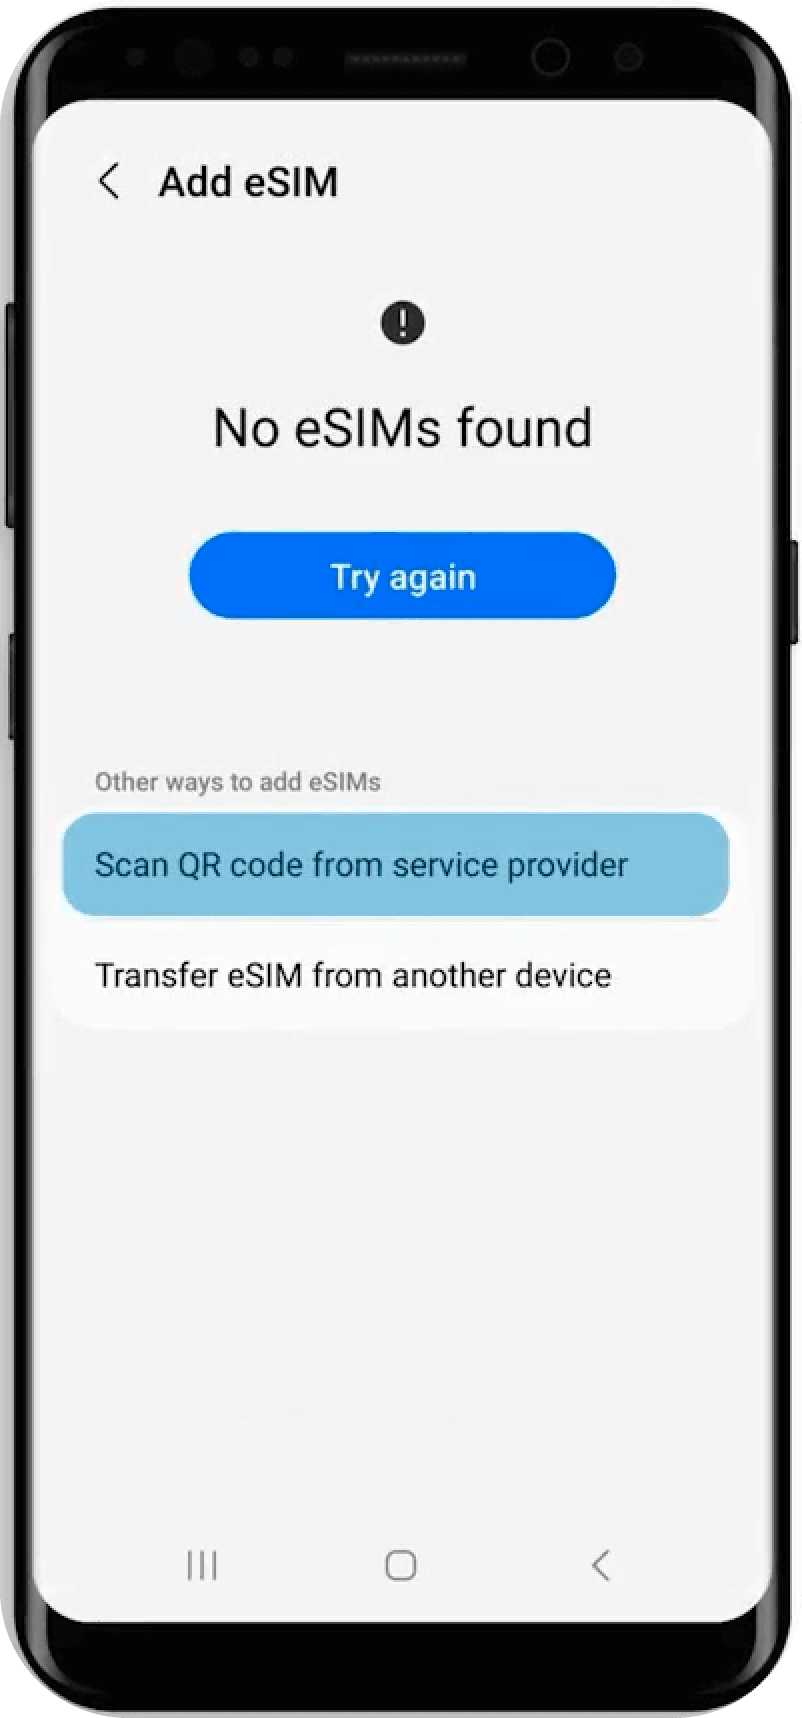
You can choose to go for quick installation or manual installation as per your wish:
Steps for Quick installation: Scan the QR code provided. You may also Tap the Gallery/Photos icon to upload your QR code.
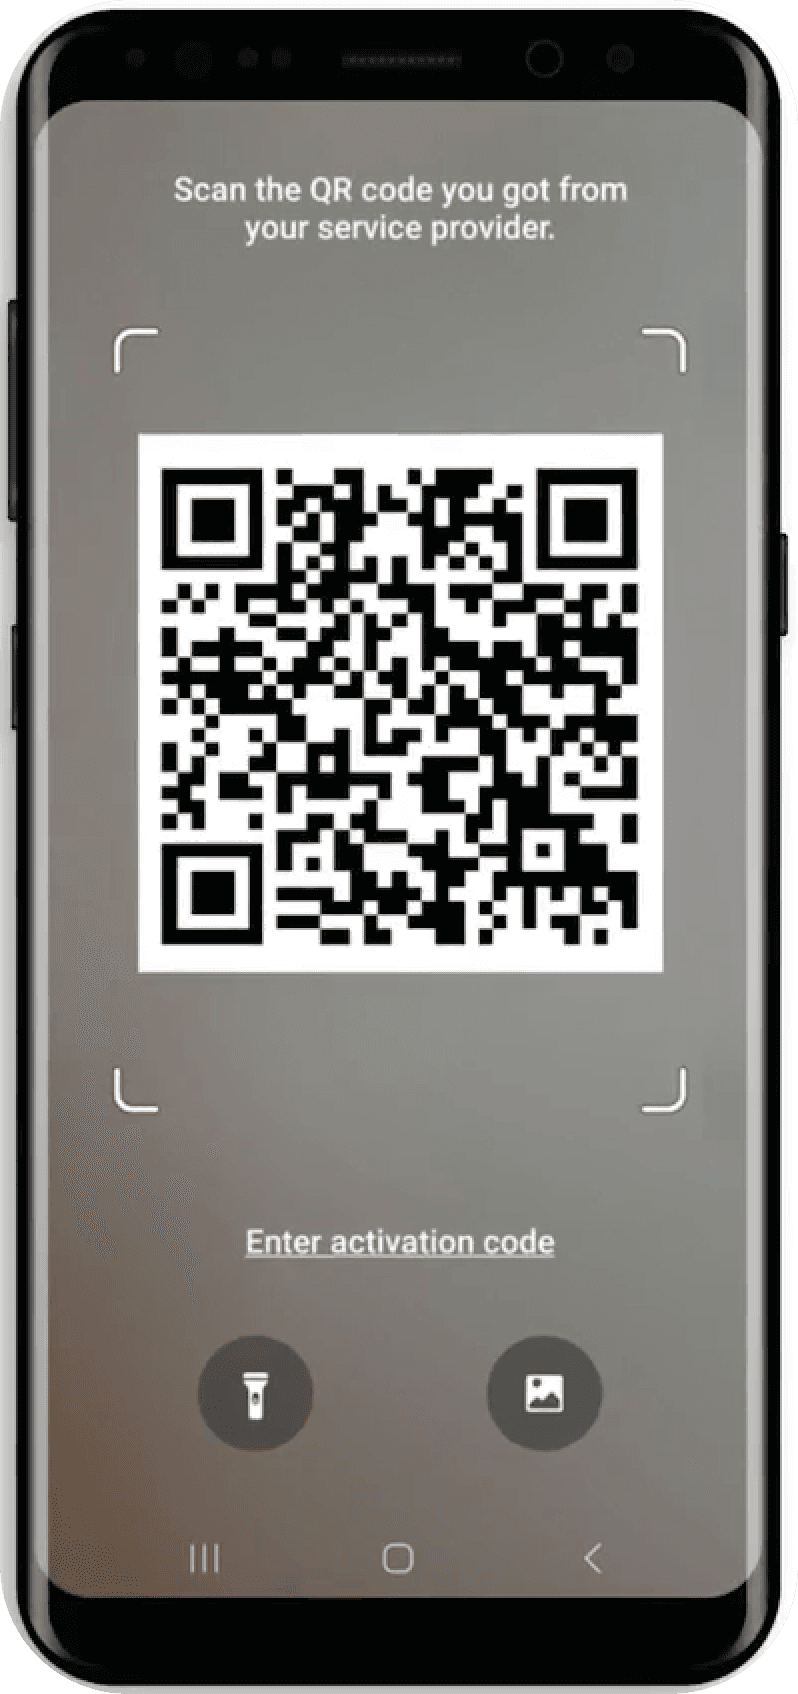
Steps for manual installation: Select Enter Details Manually. Then enter SM-DP+ Address and Activation Code.
Then tap Add on the Add Data screen.
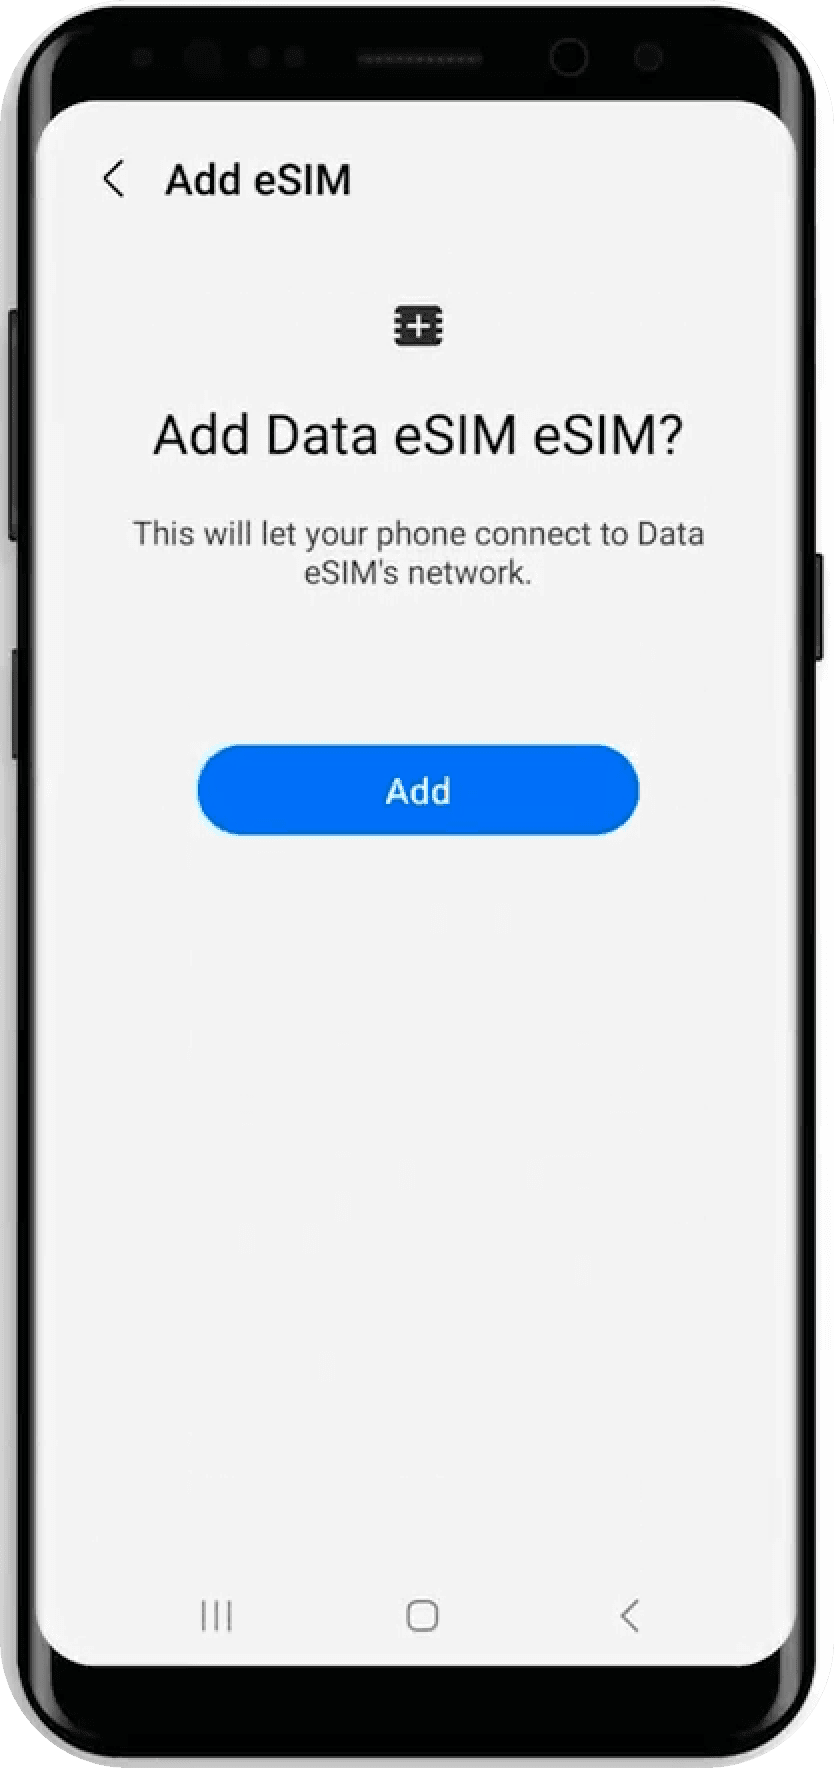
- Then allow up to 10 minutes for the eSIM to activate. Then, tap Done.
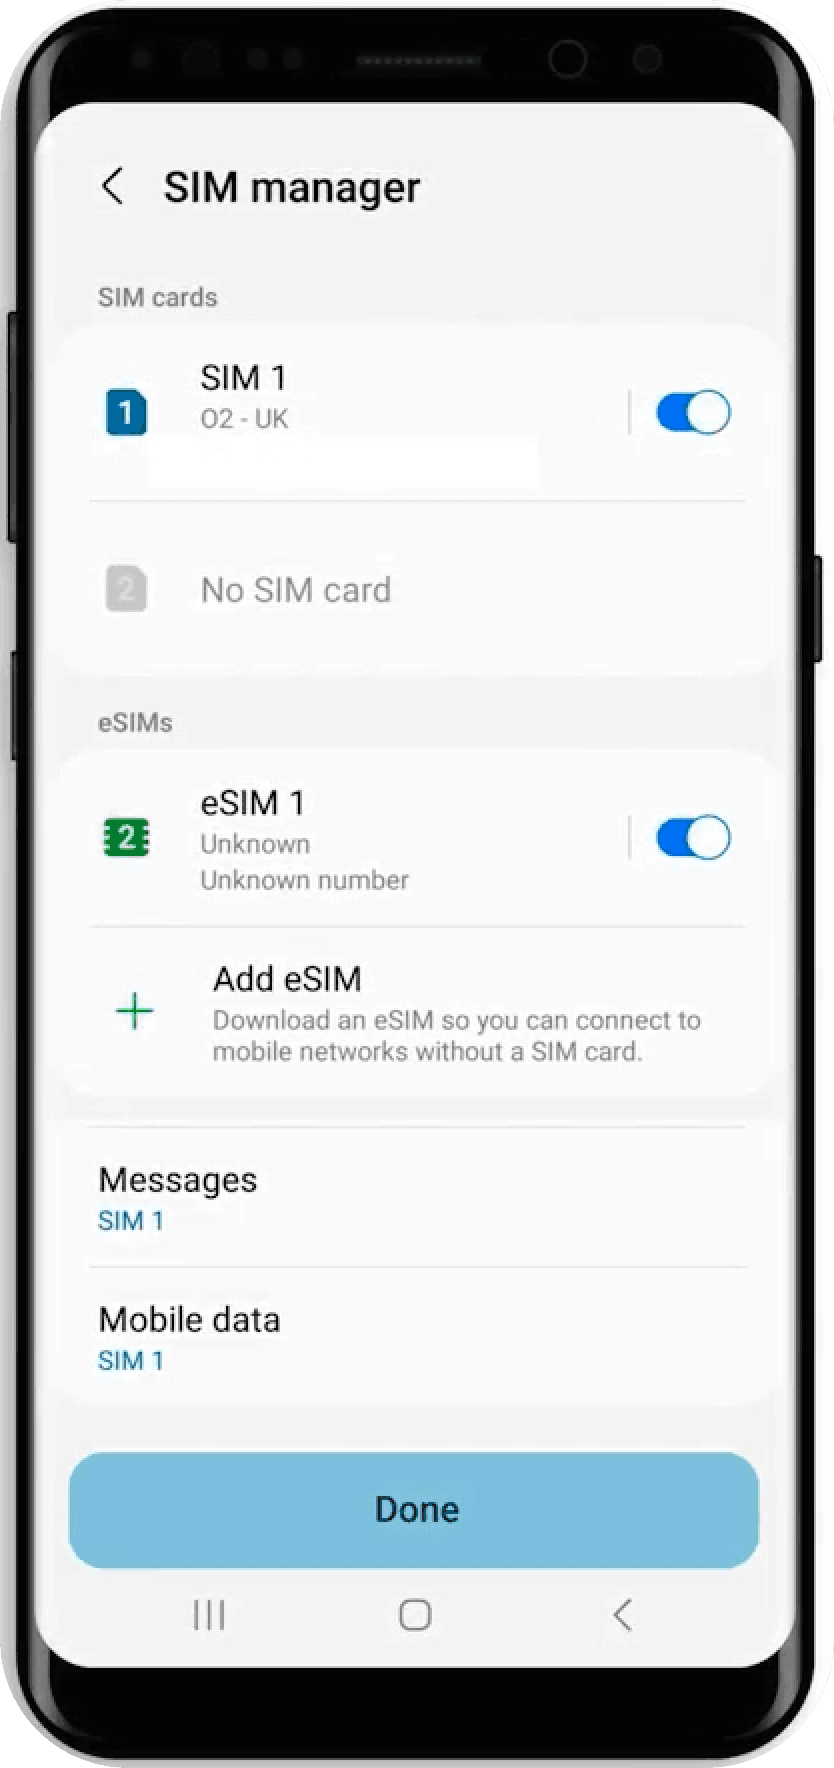
Once installed, you will see your eSIM registered on a network.
Next, the eSIM settings also need to be configured.
Leave Calls and Messages set to your original primary SIM. Tap Mobile data, select the recently installed eSIM and then tap Change.
Your eSIM is now installed and configured. To be able to use your eSIM you also need to enable data roaming. Go to your Settings, then Connections, and then tap Mobile networks. Now ensure the Data roaming toggle is set to on.
Your eSIM is now all set up and ready to go!
Checkout our video for more clarification